There are two ways to create custom images::
- creating an image from a container with the docker commit command
- creating an image from a Dockerfile by running the docker build command
Create an image from a container: the docker commit command
It is possible to create an image from a container, perhaps modified after it has been started, so that the container created from this new image already has the changes you made previously.
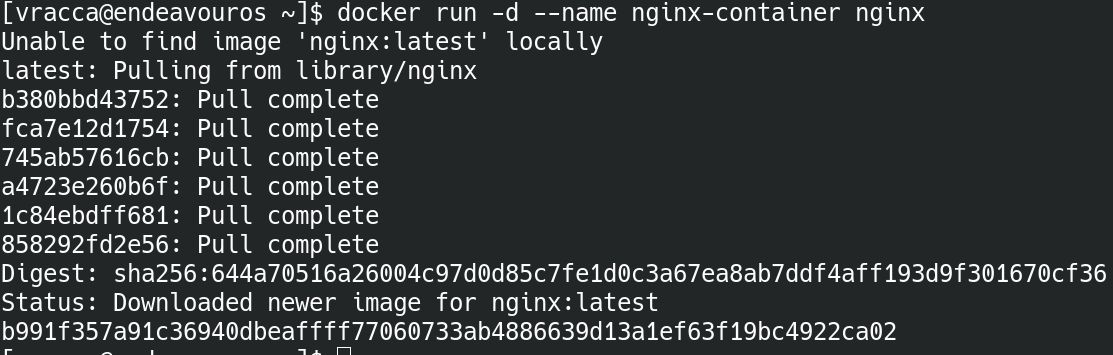
For example, create a container from an NGINX image from the Docker Hub:
Inspect the container to know its IP address (in a later article, I will talk about the Docker network):
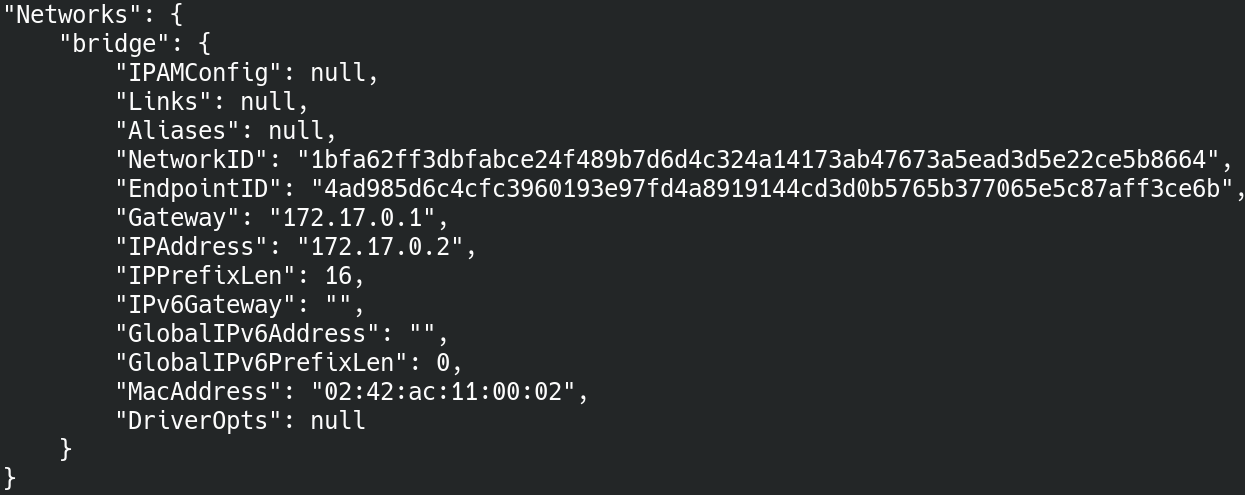
In this case the IP address is 172.17.0.2. Also in the Ports section, you can know the listening port:
"Ports": {
                "80/tcp": null
            },
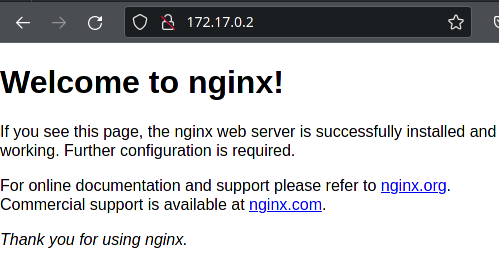
Type in the NGINX IP address from your browser: you'll get the default NGINX welcome page:
Now modify the default NGINX page by entering the container:
docker exec -it nginx-container /bin/bash
now type commands to install a text editor, since by default the container has neither VIM nor NANO:
apt update && apt install vim
modify to our liking the HTML file that contains the welcome page of NGINX, which is located at the path: /usr/share/nginx/html/index.html.
Once the page has been changed, you can refresh the browser and see that the page has been changed.
Now create an image from this container, so that you have the custom page and VIM installed by default.
To do this, type the command
docker commit nginx-container nginx-custom
You will now have a new custom nginx image called nginx-custom!

Now if you try to create a container from the NGINX custom image, you will have your page modified and VIM installed.
The Dockerfile
It is always a better choice to create an image from a Dockerfile than from a container, for documentation and maintainability.
By creating the image from a file, the Dockerfile, you can version it like any other file and thus have the benefits of a versioning system.
The Dockerfile is a text file that contains instructions for creating an image.
It must necessarily start with the FROM statement.
An example of Dockerfile: creating an image of a Java app
To introduce the commands and how the Dockerfile works, we'll try to containerize a Java app, in particular we'll use a simple Spring Boot app used in this article: Spring Boot Data Rest
The Dockerfile used will be as follows:
FROM openjdk:11-jdk
ARG JAR_FILE=target/*.jar
COPY ${JAR_FILE} application/app.jar
RUN groupadd -g 1000 java_group
RUN useradd -u 1000 -ms /bin/bash -g java_group java_user
USER java_user
EXPOSE 8080
WORKDIR application
ENTRYPOINT ["java", "-jar", "app.jar"]
CMD ["arg1", "arg2"]
See now one by one the instructions in detail
The FROM instruction
The FROM instruction is used to specify the parent image. You always start from a parent image to create a custom image.
As we said in the previous article (First steps with Docker),
an image can be formed from multiple layers (multiple images).
The FROM statement creates the first layer. Any other instruction that modifies the filesystem (such as the RUN and COPY statements),
will create an additional layer.
In this case, our source image is openjdk:11-jdk, which in turn consists of multiple images.
In fact, it is based on a Debian image, to which the Java installation is then added.
The ARG instruction
The ARG instruction is used to declare a variable that will only be available during the creation of the container.
In this case, assuming that we have built the project and created its corresponding JAR file, we are assigning to the JAR_FILE variable the JAR path.
The COPY instruction
The COPY instruction copies files or directories from the source host path (first argument) to the container filesystem (second argument).
The source path can contain wildcards (e.g. we added the asterisk in target/*.jar).
Multiple source files can be specified. If the target folder does not exist, it will be created automatically by Docker
(as in this case, with the application folder). Executing this instruction, since it modifies the image's filesystem,
will create a new layer.
COPY vs ADD
There is another instruction similar to COPY, namely ADD. It also copies files and directories to the container filesystem.
Unlike COPY, however, you can also specify a remote URL as the source. If you do not fall into the latter case,
it is advisable to use the COPY instruction.
The RUN instruction
The RUN instruction allows commands to be executed on a new layer, above the current image.
The resulting image will be used by the next step in the Dockerfile.
Creating multiple layers is a fundamental Docker concept: individual instruction are committed so that the container can be created from any point (layer) on the image.
In the example we used the statement twice to create a group called java_group and a user called java_user.
The RUN instruction can have these two forms:
- RUN <command> (shell form; the command is launched in a shell, which by default is /bin/sh -c for Linux and cmd /S /C for Windows).
- RUN ["executable", "param1", "param2" (forma exec form).
In the example Dockerfile, the first form is used. An example of the second form:
RUN ["npm","install"]
The USER instruction
This instruction allows you to set the user for the execution of the image and any RUN, CMD, and
ENTRYPOINT INSTRUCTIONS.
By default, if you don't specify a user, the container will be started with ROOT permissions.
Although some CAPABILITIES are not active, it is always a good idea, for security reasons, to boot containers without ROOT privileges.
https://man7.org/linux/man-pages/man7/capabilities.7.html
The EXPOSE instruction
This instruction informs Docker that the container is listening on one or more ports. You can specify whether the ports are listening on TCP or UDP (the default is TCP).
The EXPOSE statement does not actually publish the port. It has the function of documenting which ports are used by the container.
To publish a port when the container is started, the -p flag can be used when running docker run.
(we'll discuss this in more detail in an article on Docker networking).
The WORKDIR instruction
This instruction sets the working directory for the RUN, CMD, ENTRYPOINT, COPY and ADD instructions.
If the WORKDIR does not exist, it will be created by Docker.
The ENTRYPOINT and CMD instructions
These instructions allow you to run the container with a certain command.
CMD allows you to execute a default command that will be executed only if you don't specify a command when creating the container,
with the command docker run.
ENTRYPOINT on the other hand, will always be executed (unless you explicitly override it with the --entrypoint flag with the docker run command).
CMD has three forms:
- CMD ["executable","param1","param2"] (exec form, preferred form)
- CMD ["param1","param2"] (which allows to give default parameters to the command specified in the ENTRYPOINT instruction)
- CMD <command param1 param2> (shell form)
ENTRYPOINT has two forms:
- ENTRYPOINT ["executable", "param1", "param2"] (forma exec form, preferred form)
- ENTRYPOINT <command param1 param2> (shell form)
In the example Dockerfile, form 2 of CMD and form 1 of ENTRYPOINT are used.
CMD thus in this case adds default parameters to the command specified by ENTRYPOINT; these parameters can
be overwritten during execution of the docker run command.
The shell form of ENTRYPOINT prevents the use of arguments via CMD or via the docker run command, but has the disadvantage of creating a subcommand of /bin/sh -c that does not pass signals. This means that the true container executable command will not have PID 1, and the executable will not receive a SIGTERM signal from the docker stop <container> command.
If there are multiple ENTRYPOINT statements in the Dockerfile, only the last one will be executed. The same applies to CMD.
Now create the image from the Dockerfile: the docker build command
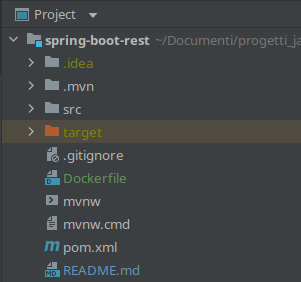
Spring Boot Rest project structure
This command allows you to build an image from a Dockerfile.
Go to the folder containing the Dockerfile, in this case the root of the spring-boot-rest project and run the command:
docker build -t spring-boot-rest .
- With -t we give a name to the image, possibly specifying a tag.
- With "." we include the folders and files within the current path. Alternatively, you can specify a path.
docker build -t spring-boot-rest .
Sending build context to Docker daemon  40.97MB
Step 1/10 : FROM openjdk:11-jdk
11-jdk: Pulling from library/openjdk
bb7d5a84853b: Pull complete
f02b617c6a8c: Pull complete
d32e17419b7e: Pull complete
c9d2d81226a4: Pull complete
fab4960f9cd2: Pull complete
da1c1e7baf6d: Pull complete
Digest: sha256:5d235a84e8e0817f8e35327c5f6ab6a81cad2fa5e9a3d9998aa8f2eb891c6c8e
Status: Downloaded newer image for openjdk:11-jdk
 ---> 40eccaa4f420
Step 2/10 : ARG JAR_FILE=target/*.jar
 ---> Running in b0df0cc5ffe4
Removing intermediate container b0df0cc5ffe4
 ---> d114ca11b755
Step 3/10 : COPY ${JAR_FILE} application/app.jar
 ---> dabd1db4c49e
Step 4/10 : RUN groupadd -g 1000 java_group
 ---> Running in e991fd3061a1
...
Step 9/10 : ENTRYPOINT ["java", "-jar", "app.jar"]
 ---> Running in 36b44717a478
Removing intermediate container 36b44717a478
 ---> 70b960a6ece8
Step 10/10 : CMD ["arg1", "arg2"]
 ---> Running in b28ac3f6421a
Removing intermediate container b28ac3f6421a
 ---> cdc8072078d8
Successfully built cdc8072078d8
Successfully tagged spring-boot-rest:latest
Note that each instruction is marked with a STEP, and each step creates an intermediate container, which is removed.
Now create the container from the Docker image:
docker run --name=spring-boot -d spring-boot-rest
Look at the list of active containers:
docker ps
CONTAINER ID   IMAGE              COMMAND                  CREATED              STATUS              PORTS      NAMES
0e51fbcdaf58   spring-boot-rest   "java -jar app.jar a…"   About a minute ago   Up About a minute   8080/tcp   spring-boot
The container is up & running!
See the logs with the docker logs command:
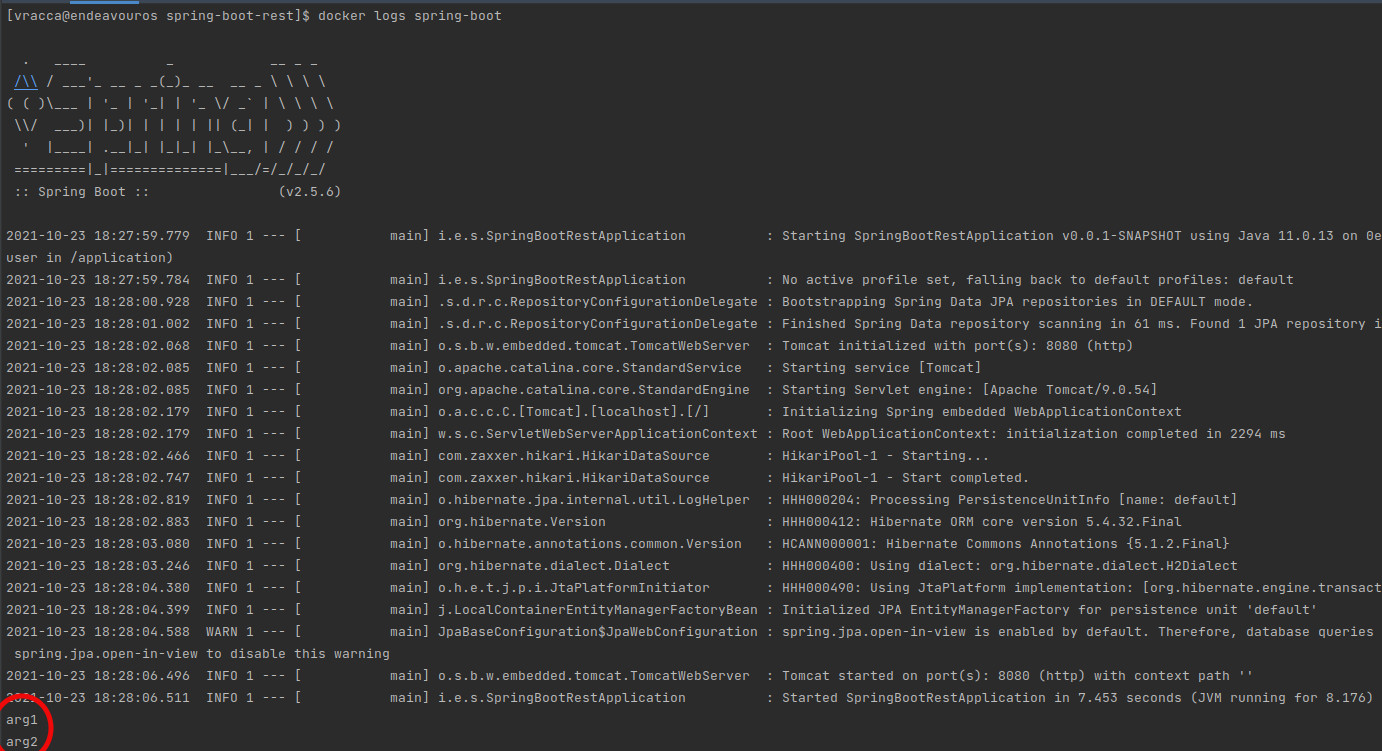
Note that the default arguments arg1 and arg2, contained in the CMD instruction, are also printed.
We can further verify that everything is ok, trying first to understand what is the IP address of the container, with docker inspect (as done in the previous example) and then do a cURL. In my case:
curl 172.17.0.2:8080
{
  "_links" : {
    "users" : {
      "href" : "http://172.17.0.2:8080/users{?page,size,sort}",
      "templated" : true
    },
    "profile" : {
      "href" : "http://172.17.0.2:8080/profile"
    }
  }
}
The Web Service has responded correctly.
Now create another container from the same image, this time passing arguments:
docker run --name=spring-boot-args -d spring-boot-rest change args
Coming to the logs, we can see that indeed the parameters of the CMD instruction have been correctly overwritten:
docker logs spring-boot-args
...
change
args
Exporting and importing a Docker image
You often need to export a Docker image and then import it to another host (if you don't use registry).
Try exporting the spring-boot-rest image you just created.
Use the command
docker save spring-boot-rest > spring-boot-rest.tar
This command creates a tar archive containing the image. To then import the image from the archive, just run the command:
docker load < spring-boot-rest.tar
Conclusions
In this article we have seen how to create a custom image either from a container or from a
Dockerfile. We have seen various Dockerfile instructions to containerize a Java Spring Boot app.
Finally, we saw how to export and import a Docker image.
For more Dockerfile instructions: https://docs.docker.com/engine/reference/builder/
GitHub link of the Spring Boot Rest project: Spring Boot Rest
Articles about Docker: Docker