The Pod in Kubernetes
In the previous article Introduction to Kubernetes we mentioned that Kubernetes is a container orchestrator. Its goal is to distribute the various containers to the different nodes of the cluster, called worker nodes.
However, Kubernetes does not directly deploy containers on worker nodes.
The containers are encapsulated in a Kubernetes object called Pod.
The Pod is the smallest object you can create in Kubernetes. It represents the single instance of an application.
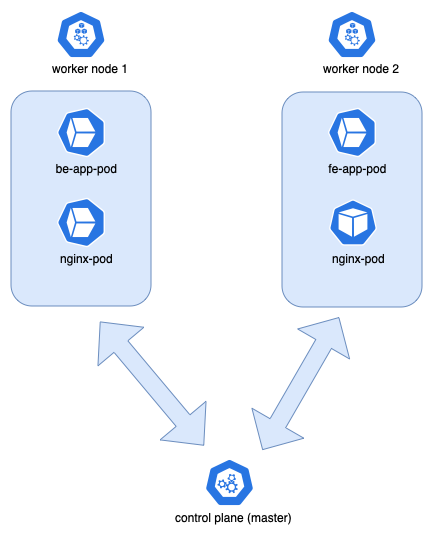 |
|---|
| Example of four Pods distributed over two worker nodes |
The Pod and horizontal scaling
Let's say you deploy a Pod of one of your applications. You will then have a single instance of that application.
What would happen if the number of users accessing that application increased exponentially?
Maybe your application is an e-commerce, which gets heavily stressed during Black Friday.
In that case, you can scale the application horizontally, that is, distribute the workload among multiple
instances of your application. That is, you increase the number of Pods in your application!
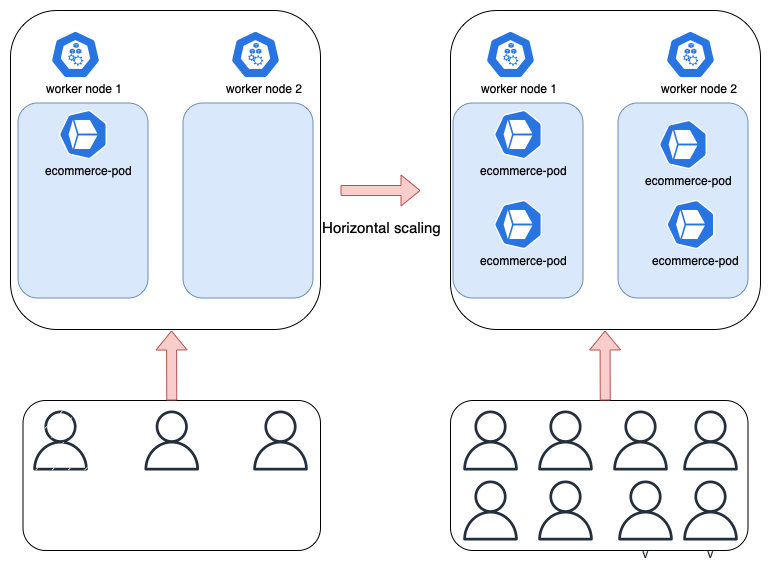 |
|---|
| Example of horizontal scaling from one to four Pods (e-commerce application instances) |
You can see from the picture that the four Pods are distributed equally on the two nodes.
If the workload increases further but the two nodes can no longer support any more load, you can
add a new Cluster node so that we can deploy more Pods still on the latter.
We will see in a later article how to perform scaling of an application on Kubernetes and then how to perform horizontal scaling.
One Pod = One container?
We said that the Pod encapsulates the container. When you want to increase the replicas of your application,
you increase the number of Pods, not the number of containers in the same Pod.
So one Pod = one container? Almost always yes. The Pod must contain a single container of our application.
However, there are such concepts as Init Container and Sidecar-Container.
The InitContainer is a container that is used to initialize your main container (i.e., your application).
It starts first, finishes its task, so that your main container can start. The InitContainer is a
concept that Kubernetes knows about and manages via its yaml manifest.
Instead, the Sidecar-Container is a design pattern. Usually the sidecar container is a container that acts as an outline to the your main container. For example, it could be a container that extrapolates from the standard output the logs of your main container to then be persisted somewhere. Read more: kubernetes.io/docs/concepts/cluster-administration/logging.
So in some special cases, it might be useful to use multiple containers in the same Pod.
Containers in the same Pod are part of the same network, so they can communicate in localhost. They also share
the same storage space.
Let's get to work with Kind!
In the previous article you saw how to create a Kubernetes cluster locally via Kind.
Also in the previous article, we said that the user uses the kubectl CLI from control-plane, so I recommend
doing the same using Kind, although you could safely use the same CLI from your host.
From the terminal, run the docker ps command to find the container representing Kind's control-plane:

Once you find the name of the container, run the bash command on it. In my case I execute: docker exec -it kind-control-plane bash.
Well, you are now in the control-plane of your Cluster. From here you will create your first Pod!
How to create a Pod
The command to create a Pod is kubectl run <pod_name> --image=<image_name>.
Create a Pod of NGINX with the following command: kubectl run nginx --image=nginx.
In this case a Pod of NGINX will be created using the official NGINX image taken from the DockerHub, with tag
latest.
To see the list of available Pods just run the command: kubectl get pods. You can also write po instead of pods. The status of the Pod will change from ContainerCreating to Running.

Pods are reachable via their IP, from all nodes in the Kubernetes Cluster.
You can run the kubectl get po -owide command to see what the IP of the Pod is.
The -o flag indicates "output," with wide you have additional information.

As you can see, this command, in addition to showing the IP of the Pod, also shows the name of the node on which it is started.
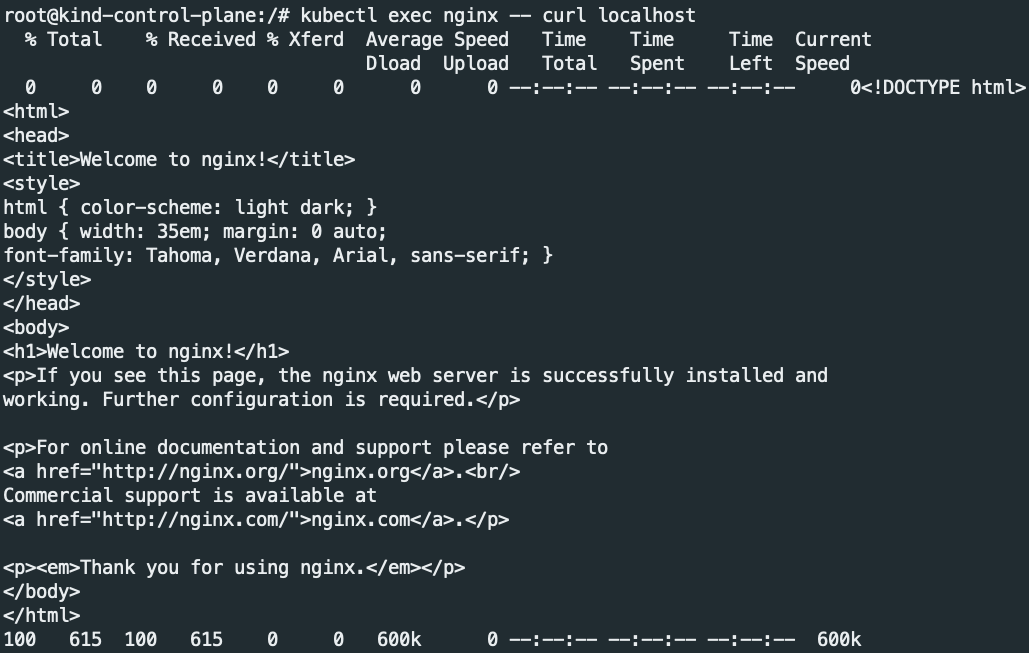
The Running status already suffices to understand that the Pod is Up & Running correctly. However, run a cURL: curl 10.244.0.6:
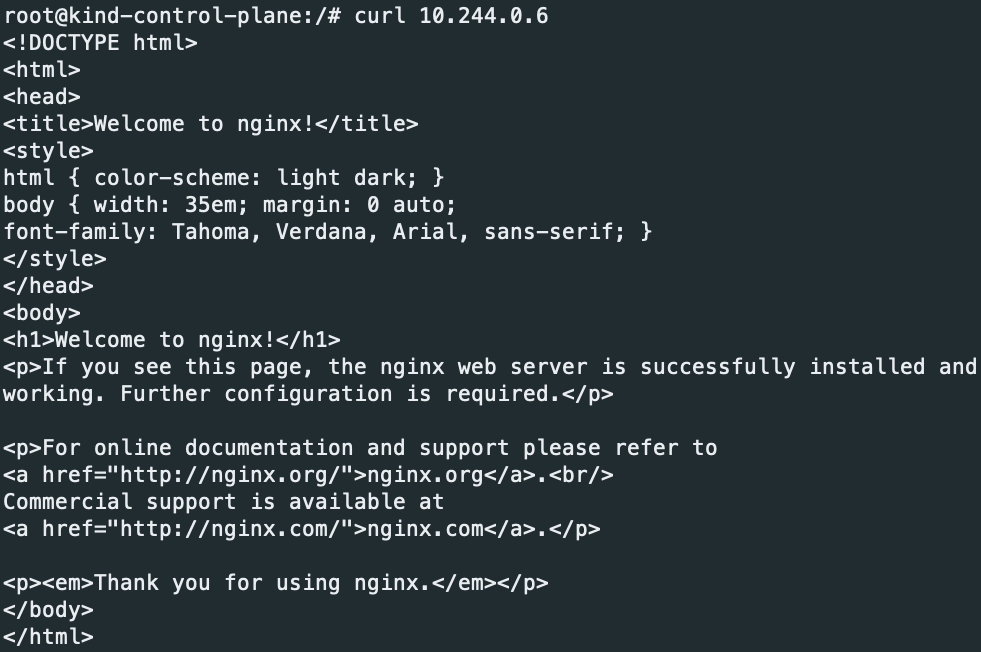
Well, as you can see, the default NGINX page is correctly displayed.
Currently, the Pod is reachable only from Cluster nodes. In the article on Services, you will see in more detail network management on Kubernetes.
Obviously, just as with Docker, it is not good practice to talk to Pods/containers via IP, since, being ephemeral, they are easily destroyed and recreated, and every time this happens, they change IP addresses.
Pod with YAML
First we created a Pod of NGINX quickly thanks to the kubectl run command.
This mode is called imperative mode.
However, the power of Kubernetes is to be able to create resources "declaratively" via yaml manifests.
As mentioned in the article on Docker Compose,
writing a manifest instead of imperatively running commands from CLI has many advantages, such as the simple fact that a
file is trivially versionable.
A Kubernetes yaml manifest always has these root fields:
apiVersion: #String
kind: #String
metadata: #Dictionary


spec: #Dictionary
- apiVersion represents the version of the Kubernetes API you want to use. Depending on the object to be created, the version of the API may change. For Pods, the version is v1
- kind indicates the type of object you want to create. For example for in case you want to create a Pod, the value of kind is just Pod
- metadata indicates, as the name says, the metadata you can associate with the object you want to create, such as its name or labels
- spec stands for specification. It depends on the object you want to create, here you will enter information such as image name, container name.
A manifest yaml of a Pod has this structure:
apiVersion: v1
kind: Pod
metadata:
  labels:
    <a_label>: <a_label_value>
  name: <pod_name>
spec:
  containers:
    image: <img_name>
    name: <container_name>
The manifest structure of a Pod is very simple. However, the manifest structure of more complex objects, such as Deployments,
has additional fields that are difficult to remember all by heart.
Fortunately, you don't have to memorize the manifest structure for every Kubernetes object.
You can run the following command to automatically create a yaml file of a Pod as needed,
that is, in this case, an NGINX Pod. First, delete the previous NGINX Pod with the command
kubectl delete po nginx.
Then run the following command to create the NGINX Pod manifest: kubectl run nginx --image=nginx --dry-run=client -oyaml > nginx-pod.yaml.
The dry-run=client flag allows you to preview the object that will be created, without actually creating it.
With -oyaml we want the command to create a preview of the object in yaml format. Finally, we want to write the standard output,
that is, the yaml manifest, to a file called nginx-pod.yaml. Let's see what the file we just created looks like:
apiVersion: v1
kind: Pod
metadata:
  labels:
    run: nginx
  name: nginx
spec:
  containers:
  - image: nginx
    name: nginx
    resources: {}
  dnsPolicy: ClusterFirst
  restartPolicy: Always
status: {}
As you can see, the command created a Pod manifest containing the NGINX container. It also assigned a label with key "run" and value "nginx." The labels are used both to be able to filter the various Pods during a search, and also to group the various objects using Selector. You will see in a later article the concept of Label & Selector.
To create the Pod, run the following command: kubectl apply -f nginx-pod.yaml.
Other useful commands
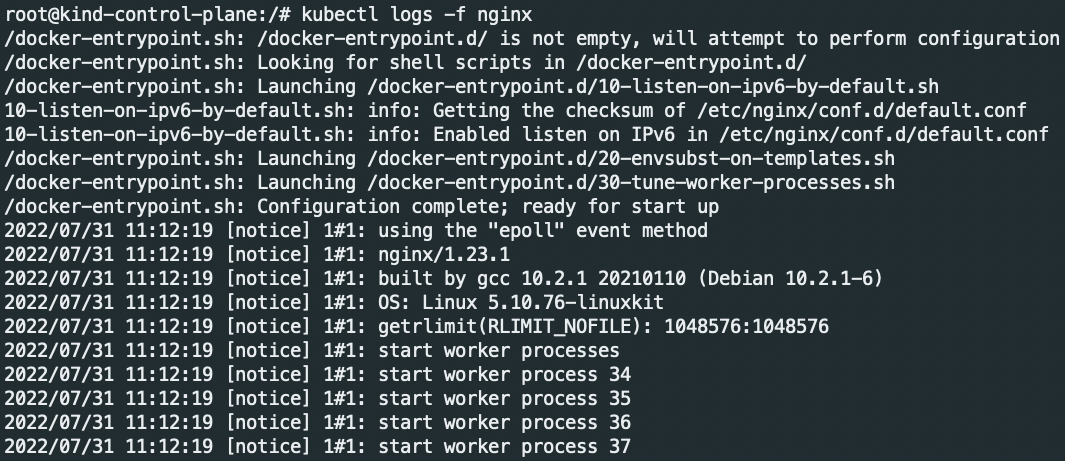
With the command kubectl logs -f <pod_name> you can see the logs of our Pod.
In case the Pod contains multiple containers, you can specify with the -c flag the name of the container.
With the command kubectl exec <pod_name> -- <cmd> you can execute a command on the Pod. As with Docker, for example.
you can get inside the Pod via bash or sh, with the following command: kubectl exec -it <pod_name> -- bash.

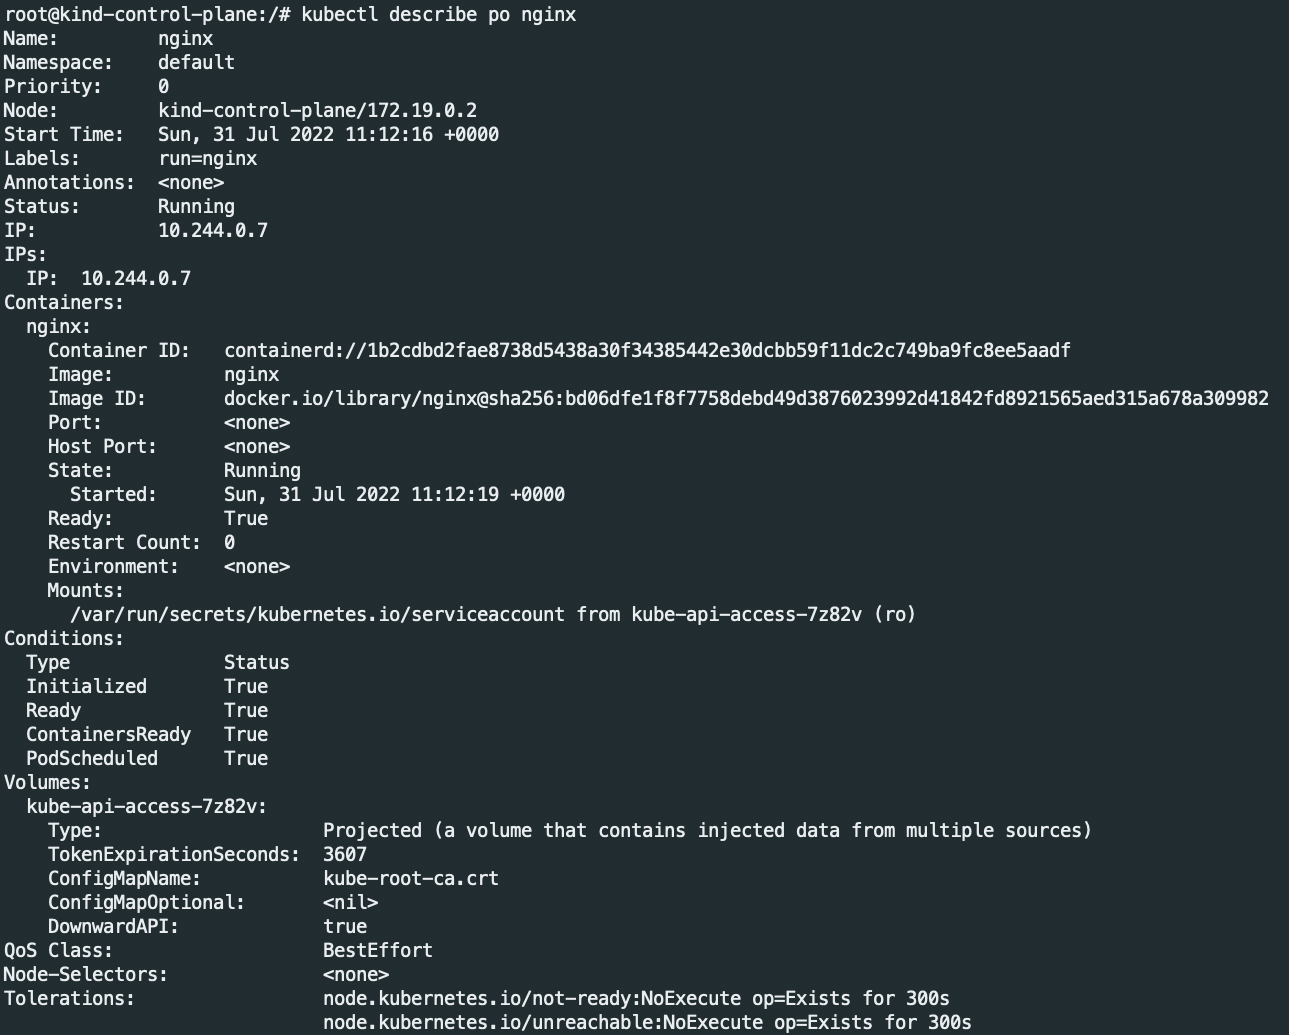
You can get additional descriptions on the Pod using the command: kubectl describe po <pod_name>.
Conclusions
In this article we talked about the Kubernetes Pod object. You have seen how to create an NGINX Pod both in imperative mode, as well as in declarative mode. To do that is, you used your Kubernetes cluster previously created with Kind.
Articles about Kubernetes: Kubernetes
Articles about Docker: Docker
Recommended books:
- Kubernetes TakeAway: Implementa i cluster K8s come un professionista: https://amzn.to/3RXgSXp
- Kubernetes. Guida per gestire e orchestrare i container : https://amzn.to/45RoqBJ
- Docker: Sviluppare e rilasciare software tramite container: https://amzn.to/3OxJbc6